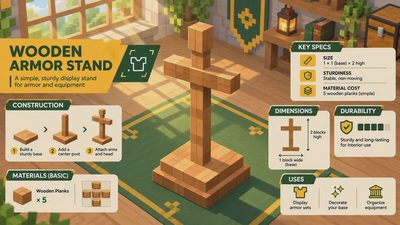

If you want to know how to craft armor stand in Minecraft, skip the nonsense: you need six sticks, one smooth stone slab, and a crafting table. The recipe is cheap, useful, and available early in a survival world. The only part that catches new players is the smooth stone slab, because regular stone and smooth stone are not the same thing. Get that distinction wrong and you will spend ten minutes staring at a crafting grid like it personally betrayed you.
Materials you need
To craft one armor stand, gather six sticks and one smooth stone slab. Sticks come from wooden planks, so any tree works. Turn two planks into four sticks, then repeat until you have six. You can use oak, spruce, birch, jungle, acacia, dark oak, or mangrove wood. The wood type does not change the armor stand’s basic function.
The slab requires smooth stone, not cobblestone, stone, or any other slab. You need three smooth stone blocks to make one smooth stone slab. That means the full preparation chain is simple but slightly longer than the recipe first suggests: collect cobblestone, smelt it into stone, smelt the stone again into smooth stone, then craft the slab from three smooth stone blocks.
A furnace and fuel are therefore part of the real cost. Coal is convenient, but charcoal, wood, lava buckets, and other furnace fuels also work. If you are still on your first night, do not burn your last food supply or valuable logs just to make a decoration. An armor stand is helpful, but it is not more important than shelter, torches, or a reliable food source.

How to make smooth stone
Start by placing cobblestone in the top furnace slot and fuel in the bottom slot. The result is stone. Move that stone back into the furnace and smelt it again. The output is smooth stone. Repeat this process until you have three smooth stone blocks.
Now open a crafting table and place the three smooth stone blocks across the bottom row. The result is one smooth stone slab. This is the slab required for how to craft armor stand in Minecraft. A regular stone slab will not substitute for it, so check the item name before leaving the table.
The fastest early-game route is to smelt the first batch of stone while you gather wood and food. Minecraft lets the furnace work in the background, and there is no reason to stand beside it watching gray blocks change into slightly different gray blocks. Queue the second smelt as soon as the first finishes. With enough fuel, the entire process takes only a few minutes.
The exact crafting recipe
Open the crafting table and arrange the ingredients in this pattern. Put one stick in the top-center slot. Place three sticks across the middle row, one in the left slot, one in the center, and one in the right. Put the final two sticks in the bottom-left and bottom-right slots. Finish by placing the smooth stone slab in the bottom-center slot.
That layout uses six sticks and one smooth stone slab. If the output does not appear, the most likely problems are an incorrect slab, a misplaced stick, or a recipe attempted in the two-by-two player inventory grid. The armor stand recipe requires the three-by-three crafting table grid. This is the part of how to craft armor stand that matters most: the materials are easy, but the arrangement must be exact.
Once the armor stand appears in the output slot, drag it into your inventory. You can repeat the recipe immediately if you have enough materials. For a basic equipment room, two or three stands are usually enough. Making ten before you have a proper base is how clutter becomes a building strategy.
Where to place an armor stand
An armor stand is a decorative entity, so placement matters more than its crafting cost. Put it on a full block with at least two blocks of vertical clearance. A two-block-high room works, but a three-block-high room gives the stand more breathing space and makes helmets easier to see. Leave a full block of space in front if you plan to equip or remove armor regularly.
Keep stands away from narrow doorways, ladders, and heavily used furnace corners. They can make a hallway look finished, but they also create annoying collision clutter. A dedicated armory beside your bedroom, storage room, or enchanting area is usually the cleanest setup. Place lighting nearby so the equipment is visible and hostile mobs cannot turn your display room into an unexpected combat tutorial.
You can place an armor stand by selecting it on your hotbar and using the normal placement control on a valid block. After placement, interact with the stand while holding armor to equip pieces. Interact with each body slot separately. To remove a piece, interact again with an empty hand or the appropriate control for your platform.
Practical uses beyond decoration
The obvious use is displaying a spare armor set. Keep one stand for mining gear, one for exploration gear, and one for emergency backup equipment. This is faster than opening several chests and trying to remember which one contains the nearly broken iron helmet. Label nearby chests with signs if you are storing matching tools, shields, food, or spare blocks.
An armor stand can also make a base easier to navigate. Put a fully equipped stand near the main exit so you can grab a replacement set before a dangerous trip. A second stand near a Nether portal gives you a visual reminder to carry fire-resistant supplies, blocks, and a shield. The stand does not provide protection by itself, but it turns equipment planning into something you can see instead of something you vaguely promise to remember.
For builders, stands add scale and life to workshops, castles, barracks, museums, and village halls. Use matching armor sets for guards or different materials to show progression from leather to diamond. Do not fill every room with them. One well-placed display usually looks intentional; twelve identical stands look like a storage problem wearing helmets.
Troubleshooting and upgrade ideas
If you cannot craft the item, verify that you are using a crafting table and that the slab is smooth stone. Check your furnace output carefully. Smelting cobblestone once gives stone. Smelting stone a second time gives smooth stone. That extra furnace step is the most common reason players think the recipe is broken.
If the stand disappears or gets damaged, inspect the area for explosions, fire, lava, and hostile mob activity. Armor stands are not invincible furniture. Creepers can ruin a display room quickly, and lava does not care how long you spent collecting diamond gear. Keep valuable equipment in a chest until the room is secure, especially in a new base with unlit caves nearby.
Players using commands can create more elaborate displays, including posed stands and stands with arms, depending on edition and available command options. That is optional territory. For ordinary survival progression, the standard stand is enough to organize gear and decorate a base without turning the project into a command-block assignment.
Best early-game route
If you only do three things, do these. First, collect enough wood for tools, sticks, and basic fuel. Second, smelt a batch of cobblestone into stone, then process three blocks of stone into smooth stone. Third, craft the slab and build the stand after your shelter has lighting and a door.
This route makes how to craft armor stand a small side project instead of a resource detour. You can finish it during normal furnace downtime while cooking food or preparing glass. The result is useful immediately: spare armor has a home, your base gains a clear equipment station, and future upgrades are easier to track.
The recipe is simple once the smooth stone step is understood. Gather six sticks, make one smooth stone slab, use the exact crafting pattern, and place the stand somewhere practical. That is the whole job. Minecraft has plenty of complicated systems waiting for your attention. This one should not be allowed to waste your evening.